Kasa Smart light switches have quietly become one of the most practical entry points into home automation, no hub required, no subscription fees, just reliable Wi-Fi-connected lighting control. For homeowners looking to upgrade from dumb switches without rewiring their entire house or hiring an electrician for every room, Kasa offers a straightforward path. These switches replace standard wall switches and integrate with Alexa, Google Assistant, and other platforms, allowing voice control, scheduling, and remote operation. They’re particularly useful for rooms where smart bulbs don’t make sense, fixtures with multiple bulbs, recessed cans, or lights controlled by multiple switches. This guide walks through everything from product selection to installation and troubleshooting.
Table of Contents
ToggleKey Takeaways
- Kasa smart light switches provide Wi-Fi-enabled home automation without requiring a hub, subscription fees, or professional installation, making them an ideal entry point for homeowners upgrading to smart lighting.
- A neutral wire is essential for Kasa smart light switch installation; older homes built before the 1980s may lack this requirement, necessitating an electrician’s assistance or alternative smart lighting solutions.
- Choose the correct Kasa model based on your lighting setup: single-pole (HS200/KS200) for one-location control, three-way kits (HS210/KS230) for dual-switch installations, or dimmer models (HS220/KS220) for brightness adjustment.
- Kasa smart light switches maintain local control even when Wi-Fi or cloud services are down, retain manual on/off operation, and support voice commands through Alexa, Google Assistant, and SmartThings integration.
- Installation requires proper identification of hot, neutral, and ground wires; most troubleshooting issues stem from missing neutral connections or incorrect three-way wiring rather than hardware defects.
- Load ratings are critical—Kasa switches support up to 150W of LED or 400W of incandescent lighting, so verify your total bulb wattage to prevent overheating and ensure long-term reliability.
What Is a Kasa Smart Light Switch and How Does It Work?
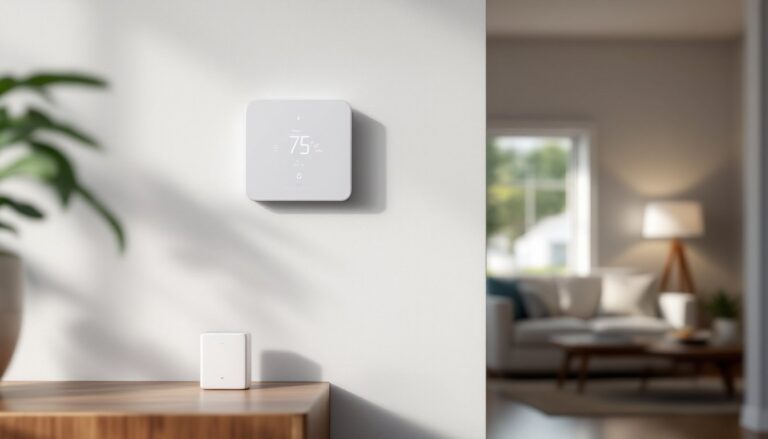
A Kasa Smart light switch is a Wi-Fi-enabled wall switch manufactured by TP-Link that replaces a traditional light switch in a standard electrical box. Unlike smart bulbs, which require the wall switch to remain on, a smart switch controls power at the wall, allowing any connected light fixture or bulb, LED, CFL, incandescent, or halogen, to be controlled remotely.
The switch connects directly to your home’s 2.4 GHz Wi-Fi network (most models don’t support 5 GHz). Once installed and paired with the free Kasa Smart app (iOS/Android), the switch communicates with TP-Link’s cloud servers to enable remote control from anywhere with internet access. No separate hub or bridge is required, which simplifies setup compared to systems like Zigbee or Z-Wave.
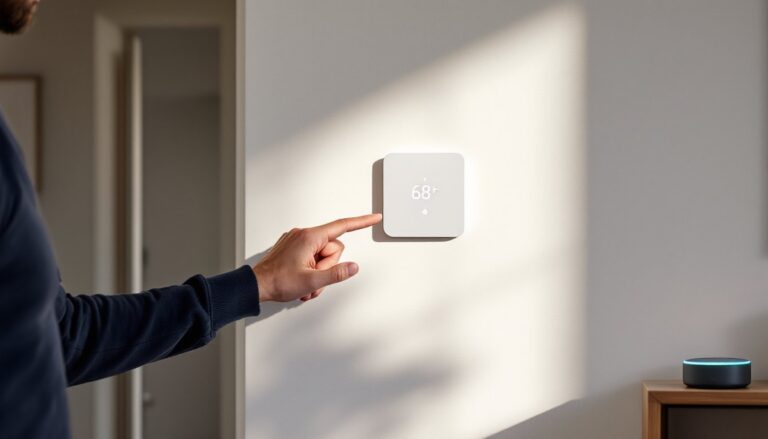
Most Kasa switches require a neutral wire in the electrical box, a white wire bundled with the hot (black) and ground (bare copper or green). Older homes built before the 1980s often lack neutral wires in switch boxes, which can complicate installation. The switch itself acts as a relay: when you tap the physical paddle or send a command via app or voice assistant, it opens or closes the circuit to the light fixture.
Kasa switches retain manual control, you can still flip them on and off like a traditional switch. They also support scheduling, timers, away mode (randomized lighting to simulate occupancy), and grouping multiple switches for simultaneous control. Power consumption is minimal, typically under 1W in standby.
Key Features That Make Kasa Smart Switches Stand Out
No hub requirement is the headline feature. While brands like Philips Hue and Lutron Caséta require proprietary bridges, Kasa switches connect directly to Wi-Fi. This reduces upfront cost and eliminates another device on your network.
Multi-way compatibility is available on certain models (like the HS210 and KS230 kits). These allow smart control of lights operated by two or three switches, common in hallways, stairwells, and large rooms. The companion switch communicates with the smart switch via a traveler wire, maintaining physical control at both locations.
Voice control integration works seamlessly with Amazon Alexa, Google Assistant, and Samsung SmartThings. Users can create routines like “Alexa, turn off all downstairs lights” or “Hey Google, dim the kitchen to 50%”, though dimming requires a dimmer-specific model (HS220 or KS220).
Scheduling and automation let homeowners set lights to turn on at sunset or off at 11 PM. The app uses your phone’s location or a set time zone. Away mode adds randomness to schedules, cycling lights on and off to deter break-ins when you’re traveling.
Energy monitoring is included on dimmer models. The app displays real-time and historical power usage, helping identify energy-hogging fixtures. This feature is uncommon in budget-friendly smart switches.
Soft-start dimming (on dimmer models) gradually ramps power to bulbs, reducing inrush current and extending bulb life. It also eliminates the jarring effect of instant-on lighting, particularly with LEDs.
One standout is local control retention. Even if Wi-Fi drops or TP-Link’s servers go offline, the physical switch continues to work. Scheduled automations stored locally also execute without cloud access.
Choosing the Right Kasa Smart Light Switch for Your Home
Kasa offers several models, and picking the wrong one wastes time and money. Start by identifying your lighting setup.
Single-pole switches (HS200, KS200 series) control lights from one location only. If flipping a switch in the bedroom turns on the ceiling fan light and there’s no second switch elsewhere, you need a single-pole. The HS200 is the most popular: on/off control, Wi-Fi, no dimming. The KS200 is the newer Matter-compatible version for future-proofing with Thread/Matter ecosystems.
Three-way switches (HS210, KS230 kits) are required when two switches control the same light. Hallways and staircases typically use three-way wiring. Kasa’s three-way kits include one smart switch and one companion switch (or two smart switches in premium kits). Don’t buy a single-pole switch for a three-way application, it won’t work correctly, and you’ll have to rewire.
Dimmer switches (HS220, KS220) add brightness control via app, voice, or a slider on the switch itself. These work with dimmable LED bulbs, CFLs, incandescent, and halogen. Verify your bulbs are labeled “dimmable”, non-dimmable LEDs will flicker or fail prematurely. The dimmer also has a minimum load requirement (typically around 10W), so a single 5W LED bulb may not work reliably. Fixtures with multiple bulbs rarely have this issue.
Check your electrical box depth. Kasa switches are about 1.5 inches deep. Shallow boxes (common in older construction) may not accommodate the switch plus wire nuts and bundled wiring. Metal boxes are tighter than plastic. If space is an issue, consider a Lutron Caséta or Leviton model with a slimmer profile.
Kasa switches are rated for 150W LED / 400W incandescent. Don’t exceed this, overloading can overheat the switch and void the warranty. For high-wattage fixtures (like a chandelier with eight 60W bulbs), you’ll need a different solution or must switch to LEDs to stay under the limit.
Finally, compare features against alternatives in Digital Trends’ smart switch roundup, which highlights how Kasa stacks up on price, compatibility, and reliability.
Installation Guide: Setting Up Your Kasa Smart Switch
Tools and materials:
- Flathead and Phillips screwdrivers
- Wire stripper/cutter
- Voltage tester (non-contact or probe type)
- Wire nuts (usually included)
- Electrical tape
- Kasa Smart switch (appropriate model)
- Smartphone with Kasa app installed
Step-by-step installation:
- Turn off power at the breaker. Locate the correct breaker for the switch’s circuit. Flip it off. Don’t rely on the switch alone, always cut power at the source.
- Test for voltage. Remove the existing switch’s cover plate and unscrew the switch from the box. Use a voltage tester on all wires to confirm power is off. Touch the tester to each wire and the box itself.
- Identify your wires. Most boxes will have:
- Black (hot/load): Brings power from the breaker or carries power to the light.
- White (neutral): Completes the circuit. Required for Kasa switches.
- Green or bare copper (ground): Safety wire.
- Traveler wires (in three-way setups): Often red or black, connecting two switches.
- Disconnect the old switch. Note which wire connects to which terminal. Take a photo with your phone for reference. Unscrew wire nuts or loosen terminal screws and remove the old switch.
- Connect the Kasa switch. Follow the wiring diagram in the included manual. Typical single-pole connection:
- Twist the switch’s green wire to the ground (bare copper).
- Twist the switch’s white wire to the neutral bundle (white wires in the box).
- Connect the switch’s black wire to the hot (line) wire from the breaker.
- Connect the switch’s load wire (may be marked or a second black wire) to the wire going to the light fixture.
- Secure each connection with a wire nut and wrap with electrical tape.
- Tuck wires into the box. Fold wires carefully, Kasa switches are bulkier than dumb switches. Avoid pinching wires between the switch and box.
- Screw the switch into the box. Use the provided screws. Ensure the switch sits flush. Attach the cover plate.
- Restore power at the breaker. The switch’s LED should blink amber and green, indicating it’s in pairing mode.
Wiring Requirements and Safety Considerations
Neutral wire requirement is non-negotiable. Kasa switches need constant power to maintain Wi-Fi. If your box has only a black (hot), red (traveler), and ground, you lack a neutral. Options:
- Hire an electrician to run a neutral from the fixture or breaker panel to the switch box. Costs vary widely ($100–$300+ depending on access and local rates).
- Use a smart switch that doesn’t require a neutral, like certain Lutron Caséta models (these use a proprietary hub).
- Install a smart bulb instead and leave the dumb switch always-on.
Load ratings matter. Kasa switches support up to 150W of LED lighting. A single fixture with six 25W-equivalent LEDs (actual draw ~4W each = 24W total) is fine. A chandelier with ten 100W incandescent bulbs (1000W) will fry the switch. Convert to LEDs or use a relay-based smart switch rated for higher loads.
Aluminum wiring (found in some 1960s–1970s homes) requires special handling and approved connectors. If you see silver-colored wire, stop and consult a licensed electrician. Improper connections with aluminum wire can cause fires.
Metal boxes and grounding: Ensure the ground wire connects to both the switch and the metal box via a grounding screw or pigtail. Plastic boxes don’t require this, but metal boxes must be grounded per NEC standards.
Dimmer compatibility: If installing a dimmer model, verify all bulbs on the circuit are dimmable. Mixing dimmable and non-dimmable bulbs causes flicker, hum, or premature failure.
If you’re uncomfortable working with 120V wiring, or if your local jurisdiction requires a permit for device replacement (some do for anything beyond like-for-like swap), hire a licensed electrician. Most jurisdictions allow homeowners to replace devices without a permit, but adding new circuits or upgrading panels requires one.
Connecting to the Kasa App and Smart Home Platforms
Once the switch is wired and powered, setup takes about five minutes.
- Download the Kasa Smart app from the Apple App Store or Google Play.
- Create a TP-Link account or log in if you already have one. The app requires an account to sync devices across multiple phones or locations.
- Add a new device. Tap the “+” icon, select “Switch,” then choose your model (HS200, HS220, etc.).
- Connect to the switch’s Wi-Fi. The switch broadcasts a temporary Wi-Fi network (Kasa_Switch_XXXX). Your phone will prompt you to join it. Confirm in your phone’s Wi-Fi settings.
- Select your home Wi-Fi network. The app will scan for available 2.4 GHz networks. Select yours and enter the password. The switch will connect and the LED will turn solid.
- Name the switch. Choose a descriptive name like “Living Room Ceiling” or “Front Porch.” This name is used for voice commands, so keep it clear.
- Assign to a room or group (optional). Grouping switches lets you control multiple lights with one command (“Alexa, turn off the bedroom”).
Voice assistant integration:
- Alexa: In the Alexa app, go to Devices > Add Device > Light > TP-Link Kasa. Sign in and discover devices. Create routines in Alexa for advanced automation.
- Google Assistant: Open the Google Home app, tap Add > Set up device > Works with Google > TP-Link Kasa. Link your account and assign devices to rooms for natural voice control, similar to how voice control setups streamline smart home interactions.
- SmartThings: In the SmartThings app, tap Add Device > By brand > TP-Link Kasa. Link your Kasa account.
Apple HomeKit is not natively supported on most Kasa switches. The KS200 and newer models support Matter, which bridges to HomeKit via a Matter controller (HomePod, Apple TV). Older HS-series switches require a workaround like Homebridge (a third-party software bridge running on a Raspberry Pi or NAS).
Scheduling and automation are configured in the Kasa app. Tap the switch, then Schedule. Set times, days, and actions (on/off/dim level). Use “Smart Actions” to create triggers like “turn on at sunset” or “turn off 10 minutes after turning on” (useful for closets and laundry rooms).
Firmware updates happen automatically when the switch is connected to Wi-Fi and powered. TP-Link occasionally pushes updates to improve stability or add features. Check for updates manually in the app under Device Settings > Firmware Update.
Troubleshooting Common Kasa Smart Switch Issues
Switch won’t enter pairing mode (LED not blinking):
- Confirm power is on at the breaker.
- Hold the switch’s reset button (small pinhole) for 5 seconds with a paperclip until the LED blinks.
- Check neutral wire connection, loose neutrals prevent the switch from powering up.
Switch won’t connect to Wi-Fi:
- Kasa switches only work on 2.4 GHz Wi-Fi. Disable 5 GHz temporarily or use a router with separate SSIDs for each band.
- Move your router closer to the switch during setup. Concrete walls and metal studs block signals.
- Restart your router and phone. Toggle airplane mode on and off.
- Check for special characters in your Wi-Fi password. Some routers handle symbols poorly, try a simpler password temporarily.
Switch works locally but not remotely:
- Confirm your phone has internet access (mobile data or different Wi-Fi network).
- Check TP-Link’s server status. Occasionally cloud services go down. Local control still functions.
- Verify the switch’s firmware is up to date. Outdated firmware can break cloud communication.
Lights flicker or dim randomly:
- Non-dimmable LEDs on a dimmer switch cause this. Replace bulbs with dimmable LEDs.
- Total wattage below the minimum load (usually 10W for dimmers). Add more bulbs or use a higher-wattage LED.
- Loose wire connections at the switch or fixture. Turn off power and tighten all connections.
- Electromagnetic interference from nearby devices. Try moving the switch to a different circuit or relocating the router.
Voice commands don’t work:
- Re-link the Kasa skill/action in your voice assistant’s app. Unlink, then link again.
- Use the exact device name assigned in the app. “Living Room Light” works: “Living Room” might not.
- Disable and re-enable the Kasa skill or action. Sometimes the connection drops after a firmware update.
Switch is hot to the touch:
- Overloading the switch beyond 150W LED / 400W incandescent rating. Reduce the number of bulbs or switch to lower-wattage LEDs.
- Poor ventilation in a crowded electrical box. If the box is packed with wires and devices, heat builds up. Consider a larger box or removing unnecessary wire nuts.
- Defective switch. If the switch is hot even with minimal load, contact TP-Link support for a replacement.
Physical switch doesn’t respond:
- Toggle the breaker off and on. Sometimes a power surge locks up the switch’s microcontroller.
- Factory reset the switch and reconfigure. Hold the reset button for 10 seconds.
- Inspect for a tripped internal fuse (rare). If the switch has no LED and no response, it may be dead and require replacement.
Performance reviews from sources like CNET’s Kasa smart switch coverage and Tom’s Guide’s hands-on testing confirm that most issues stem from installation errors, particularly missing neutral wires or incorrect three-way wiring, rather than hardware defects. Double-check wiring diagrams and wire connections before assuming the switch is faulty.